This is where IKEA-style layouts excel. By displaying components in a clean line or grid, viewers can quickly understand what is included before moving on.
While you could manually position every part, Cadasio includes dedicated tools that make creating this style of layout fast, consistent, and easy to update.
Why use IKEA-style layouts?
IKEA-style layouts work well because they:
- Clearly communicate which parts are required
- Reduce visual clutter
- Provide a familiar, easy-to-read format
- Work especially well alongside item numbers and callouts
In Cadasio, these layouts can be fully interactive or presented as clean, static views depending on your needs.
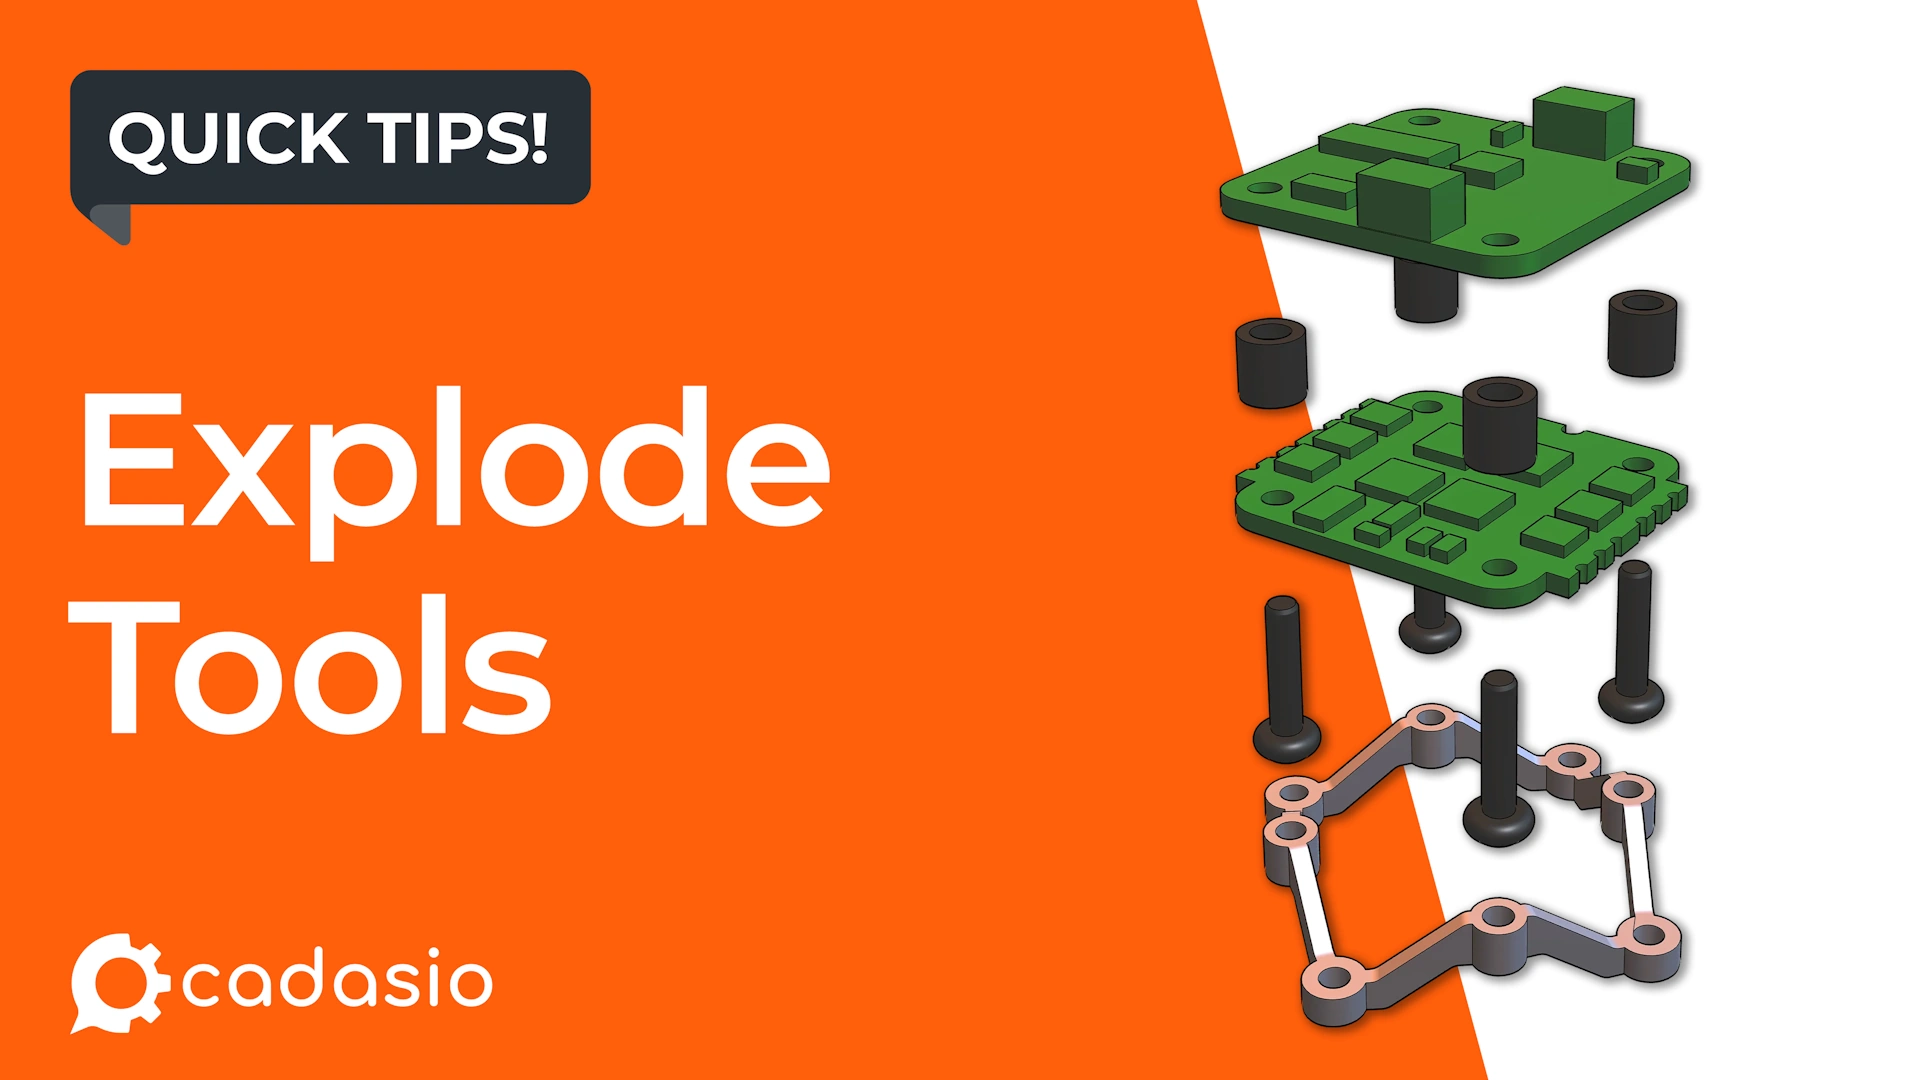
Using the Layout tool
The Layout tool is the foundation of this workflow. It can be applied to all visible parts or to a specific selection.
For controlled layouts, it is best to preselect the required components, often using a selection set. Everything else can remain visible initially or be hidden automatically, depending on how you create the layout.
The Layout tool is accessed from the Transform Tools tab in the left-hand panel.
Grid layouts for an IKEA look
To achieve a classic IKEA-style layout:
- Choose the Grid formation
- Enable ordering by size so items are arranged logically
- Click Create to preview the layout
Once the preview appears, you can adjust:
- The number of items per row
- The spacing between items
The layout tool positions the objects automatically, saving you from manually translating each part. After creation, the parts are not locked, so you can still fine-tune their positions if needed.
Adjusting part orientation
Often, parts need to be rotated so they present clearly in the layout.
For small sets, you can:
- Toggle rotate mode on the triad using Alt
- Adjust angular increments using the plus and minus keys
For larger sets, this quickly becomes inefficient.
Orientate Axis Upwards
To speed things up, Cadasio includes Orientate Axis Upwards.
Preselect the parts you want to orient. A bounding box appears around each object. Simply click the face you want to point upwards, and Cadasio automatically rotates each part accordingly. This is a major time saver when working with many components.
Keeping parts aligned with the Align tool
When layouts are first created, all items sit on the same level. However, after rotating or manually adjusting parts, alignment can drift.
The Align tool ensures everything sits neatly on the same plane:
- Select the objects you want to align
- The first selected object becomes the reference
- Choose the surface or mid-plane that the remaining objects should align to
This helps maintain a clean, professional appearance.
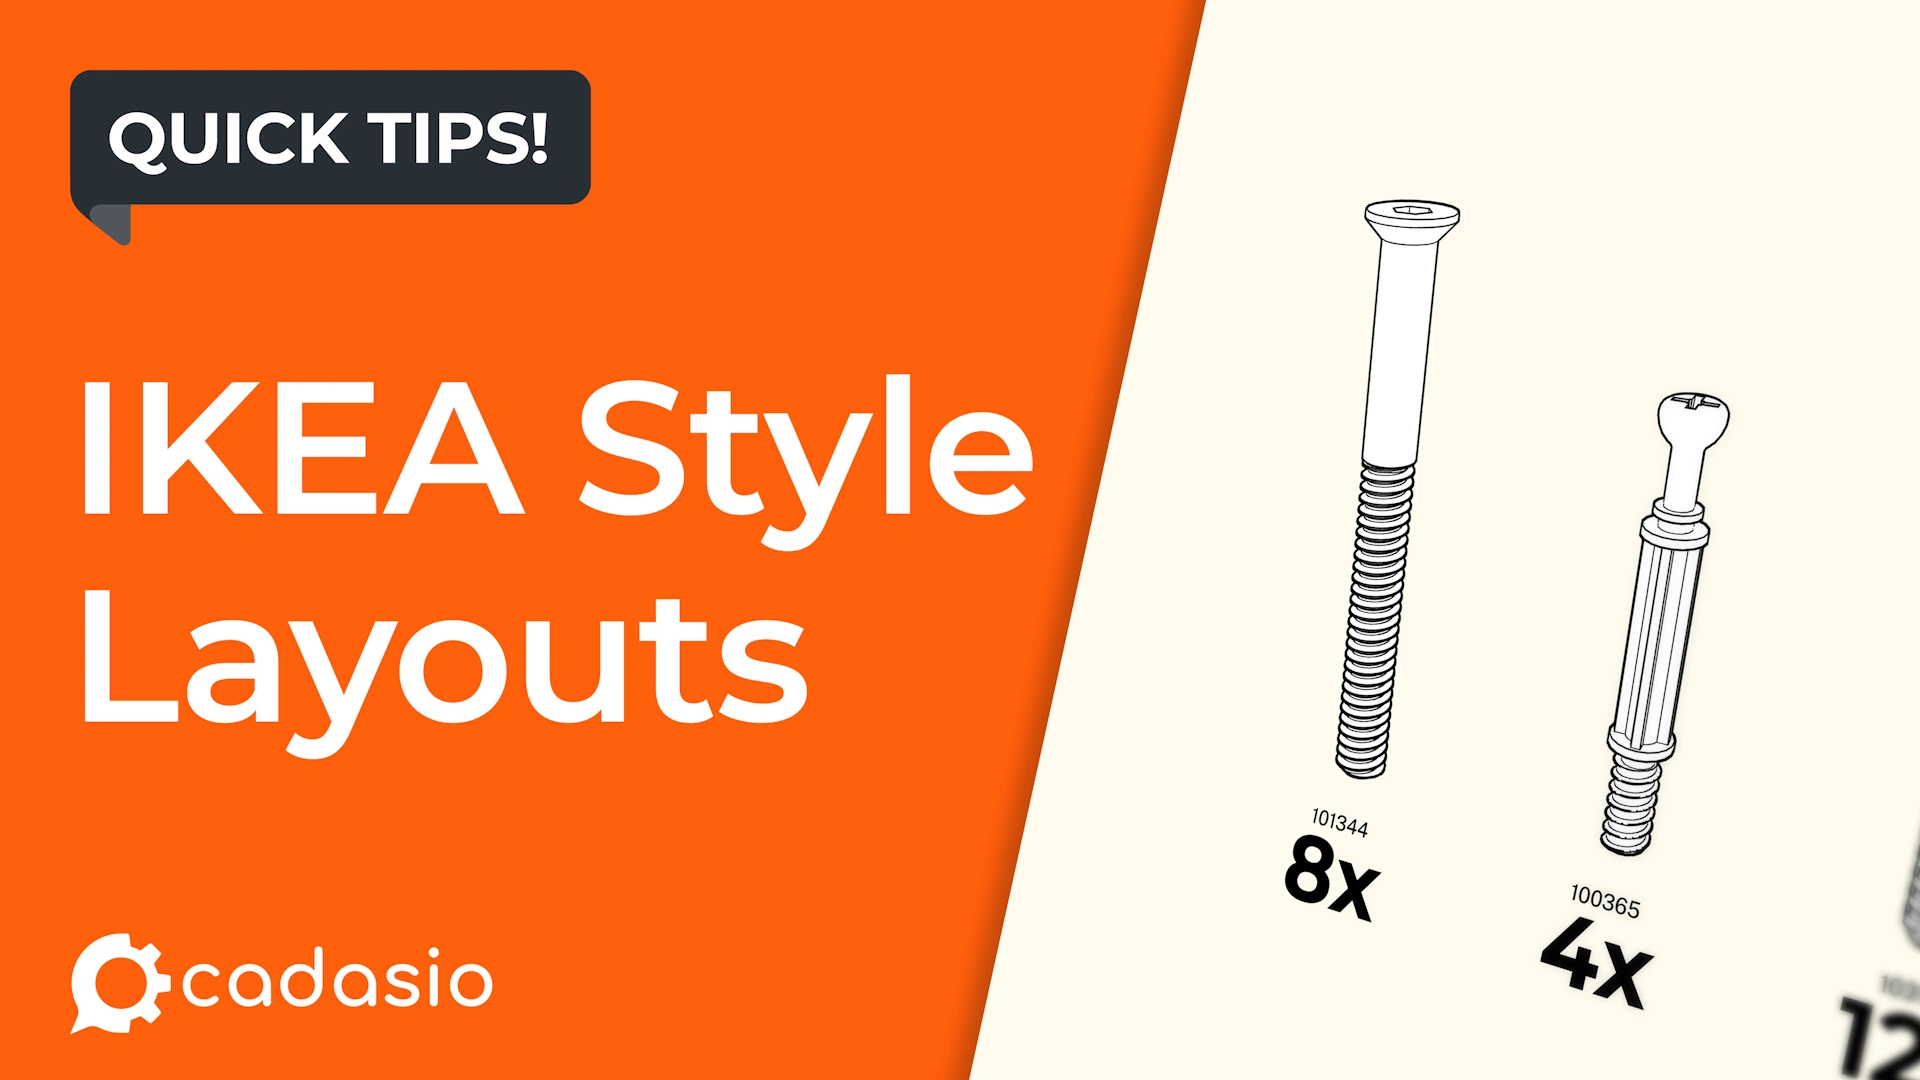
Assigning item numbers
IKEA-style layouts are usually accompanied by item numbers.
In Cadasio, item numbers are stored as a property on each part. You can edit these manually in Meta Properties, but this is not always practical.
Automatic item numbering
To number parts quickly:
- Select the objects in the order you want them numbered
- Open the Tools tab and choose Item Numbering
- Set the numbering to apply only to the selected items and in selection order
When accepted, the scene does not change visually, but each part’s Meta Properties are updated with the new item numbers automatically.
Displaying item numbers with balloons
To display item numbers visually, use the Item Number Balloon from the toolbox.
To add multiple balloons at once:
- Preselect the required parts
- Right-click the Item Number Balloon toolbox item
Cadasio will automatically place a balloon on each selected object.
Because all balloons are instances of the same toolbox item, you can:
- Select one balloon
- Press forward slash to select all instances
- Use the 2D arrange tools to align and tidy them quickly
Managing balloons and camera behaviour
When viewers rotate the model, 2D items can sometimes overlap or move in undesirable ways. Cadasio offers several ways to handle this.
Pinning balloons
Pinned balloons stay fixed in place, although their leaders still adapt to camera movement.
Auto hide by step
Using the Auto Hide option set to Step, balloons are only visible when the camera is close to the saved step orientation. As the viewer rotates away, they fade out and reappear when the original view is restored.
Locking the camera
For a fully static, 2D-style presentation, you can lock the camera using the pin icon on the Camera tab. With the camera fixed, balloon visibility no longer needs managing.
Improving step transitions
By default, Cadasio tweens object positions and visibility between steps. For layouts, this can sometimes look messy.
A cleaner approach is to change the step transition to:
- Fade
- Push
- Other directional transitions
These options produce clearer, more intentional animations between steps.
Clean, clear assembly layouts made easy
With layout grids, orientation tools, alignment controls, and automated item numbering, Cadasio makes it easy to create IKEA-style layouts that are clean, readable, and professional.
By combining these tools thoughtfully, you can produce assembly instructions that clearly communicate what is required at each stage, while remaining easy to maintain and update as designs change.